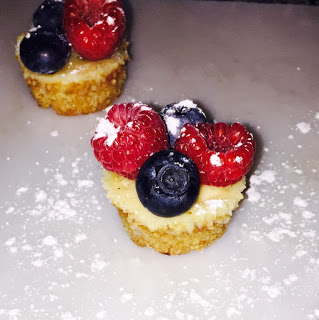
Mini-Cheesecake Bites (Gluten-Free)
Happy Cooking! In the week leading up to Thanksgiving, we hope we can give you some tasty recipes to make your life easier when prepping for any Friendsgivings and then the big day!
There’s nothing like the savory richness of cheesecake, which makes it so hard to say no to! But making an entire cheesecake is a HUGE commitment, and a bit of a hassle when it comes to serving.
These mini cheesecake bites will help make the whole process a lot simpler for you to put together, bake, serve, and also eat.
The nut crust is amazing, with the almond giving a great flavor while also being gluten free. And pre-baking it prevents it from being soggy (which nut crusts tend to do if you do not bake them). If you don’t want to use almond flour, you can use any nut flour or nut meal that you like. OR you can use a graham cracker crust here, which I’ve also provided below.
Prep Time: 20 Minutes
Cook Time: 20 Minutes
Chill Time: ~2 Hours
Total Time: ~3 Hours

For the Almond Flour Crust
- 1 1/4 cup almond flour
- 1/4 cup granulated sugar or raw sugar
- Pinch of salt
- 1 tablespoon lemon zest (from 1 lemon)
- 3 tablespoons unsalted butter (slightly melted and cooled)
(If you prefer Graham Cracker Crust)
- 1 1/2 cups graham cracker crumbs
- 1/3 cup granulated sugar or raw sugar brown sugar
- 6 tablespoons unsalted butter, melted
For the Filling
- 1 pound (lb) of reduced fat cream cheese (16 oz – usually two square containers)
- 1/2 cup granulated sugar or raw sugar
- 1 teaspoon vanilla extract
- Pinch of salt
- 2 large eggs, room temperature
For Decoration (Optional)
- Berries and/or powdered sugar

- Preheat oven to 350 F. Line your mini muffin pan with 12 muffin liners. (If you end up having extra with your ingredients or filling, feel free to make more!)
- Prepare the crust. In a medium mixing bowl, mix together almond flour, sugar, pinch of salt, and lemon zest (which you can use a zester or grater). Then stir in the butter and mix until thoroughly combined.
- Divide the crust mixture into each liner (3 1/2 teaspoons of crust mixture per liner) and lightly press down with the bottom of a shot glass.
- Bake just the crust for 10 minutes, or until very lightly browned. Remove from the oven and cool for at least 10 minutes while preparing the filling.
- Now filling preparation! Using an electric hand mixer, or stand mixer if you have either, beat together the cream cheese and sugar at medium speed until light and creamy. (If you do not have one of these, use a whisk and do by hand.) Add the vanilla and pinch of salt, and beat until thoroughly combined. Beat the eggs in on low, one at a time. Be careful not to over mix.]
- Fill each cupcake liner about 2/3 full with the batter on top of the crust, and bake for 10 minutes, or until the centers of the cheesecakes do not jiggle when the pan is tapped.
- Open the oven door (at least 1 foot wide) and let the cheesecakes cool to room temperature – about 1 – 1 1/2 hours. (You can shut the oven off for this). For easiest removal of the cheesecakes, remove the paper liners now. They can also be removed after chilling, but the cheesecake and crust is more likely to stick then. Chill for at least 2 hours before serving.
- Decorate with berries and dust with powdered sugar, if desired. You can refrigerate for up to 4 days, and these work well to freeze as well.


