My top 3 editing apps + on the go editing tips to make your photos POP
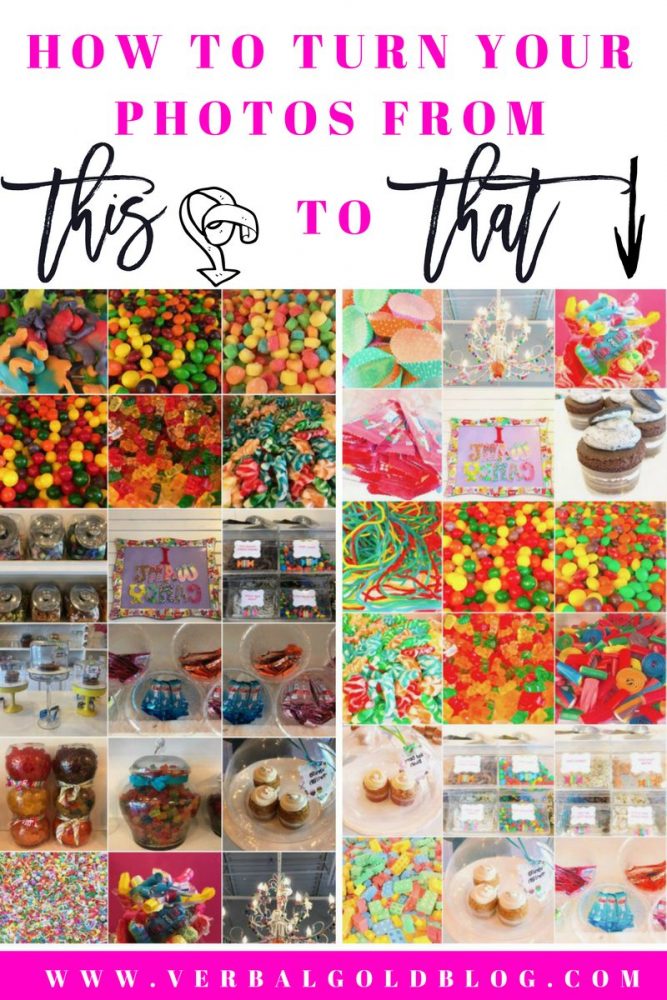
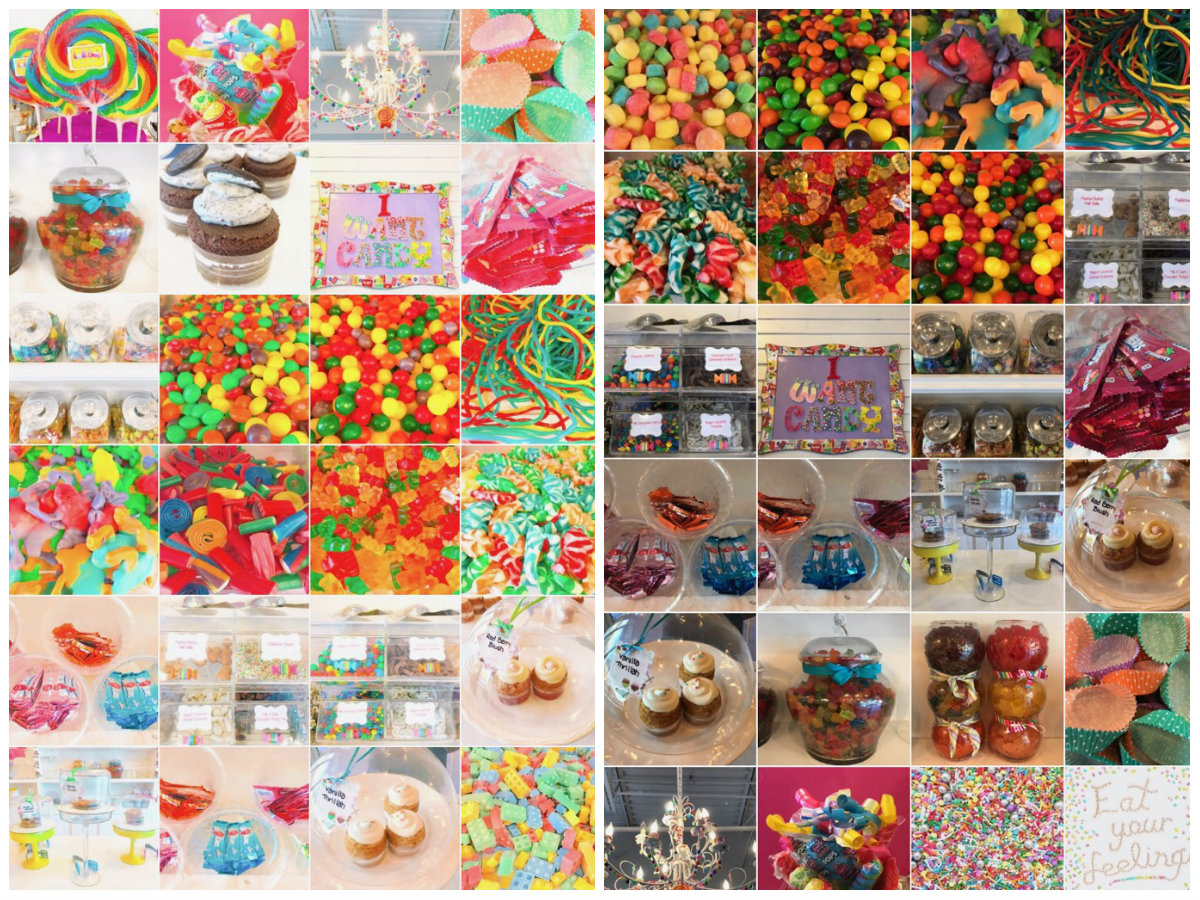
As a travel blogger I’m constantly on the go, so unless it’s for a big project or a blog post I’m usually editing on my phone. For blog posts I use Lightroom, which I can go over later, but these editing tips are for social media posts mainly. I tend to edit my Instagram photos lighter, brighter, and with more saturation than my blog post photos. This is one of the top questions we get on Instagram so I’m going to go over the top apps I use and exactly what I do to make my photos stand out!
These tips are strictly for color correction and brightening. I’ll also be showing you how to remove unwanted people from photos along with a few other editing tips in another post. You’ll see these 3 apps a lot but I use them in completely different ways depending on what I want to accomplish.
These are the top 3 apps I use to improve my photos!
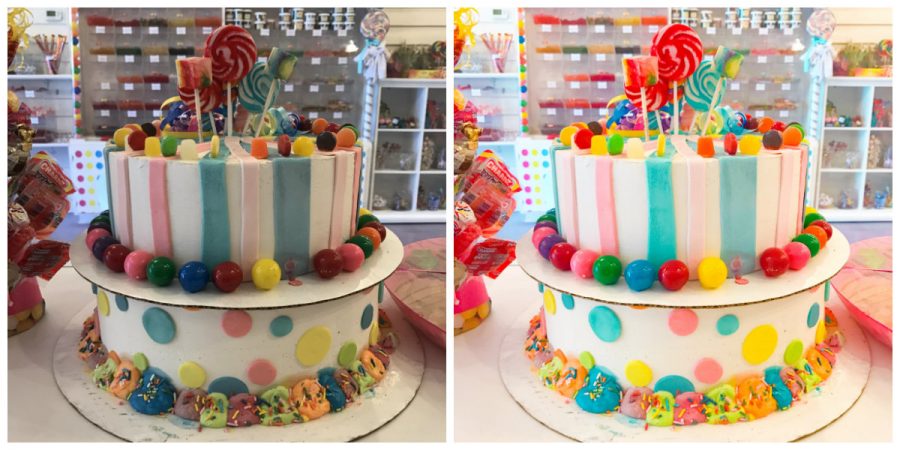
1. A Color Story
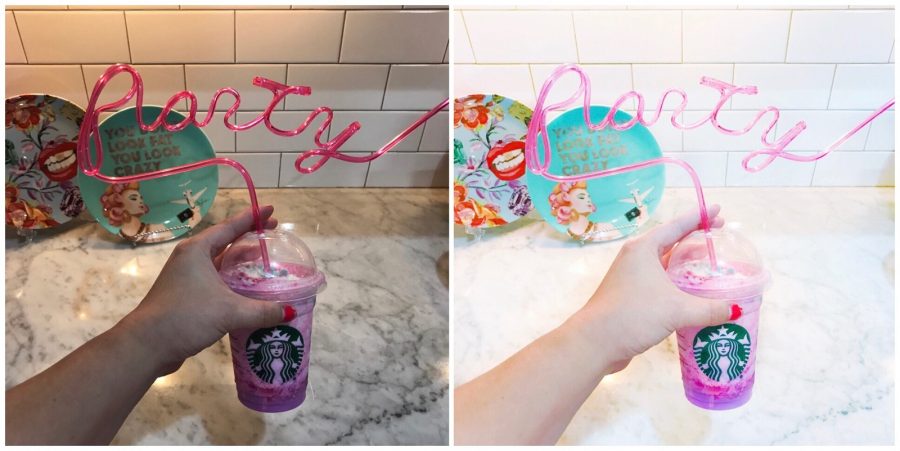
If your photo doesn’t need that much work I recommend using A Color Story. They have some great filters in there and you can pick the ones that fit your brand. Just add them to your favorites folder so they’re easy to get to quickly. For example, the filters I used to achieve the look above, and what I use on most all photos, are Simple Syrup and Candy Apple. I also use Pop, Punch, Clear, Carrie, Peach, Cool Down, Ice Ice, Spring, and Snow occasionally depending on the white balance of the photo.
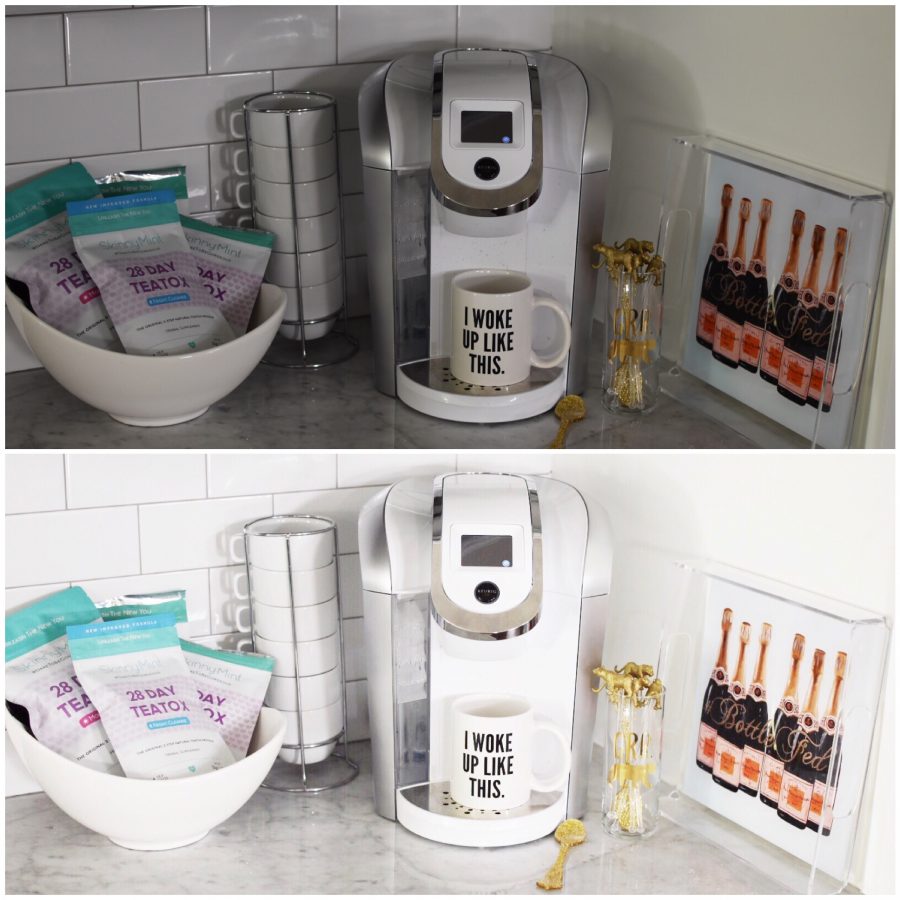
I also love A Color Story because there are tools where you can manually adjust the brightness, saturation, vibrance, sharpen and temperature of your photo. Bonus, there are effects like bokeh, light leaks, color fog, glow, and skies over to add a little something extra to your photo like I did here.


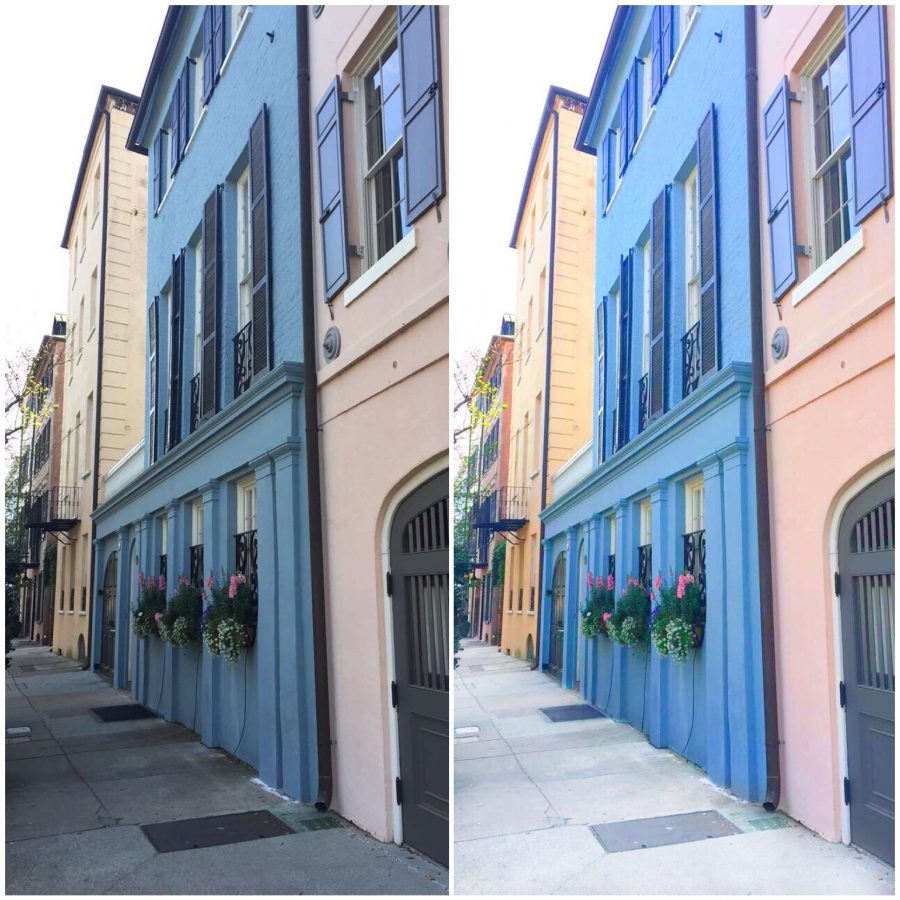
2. Snapseed
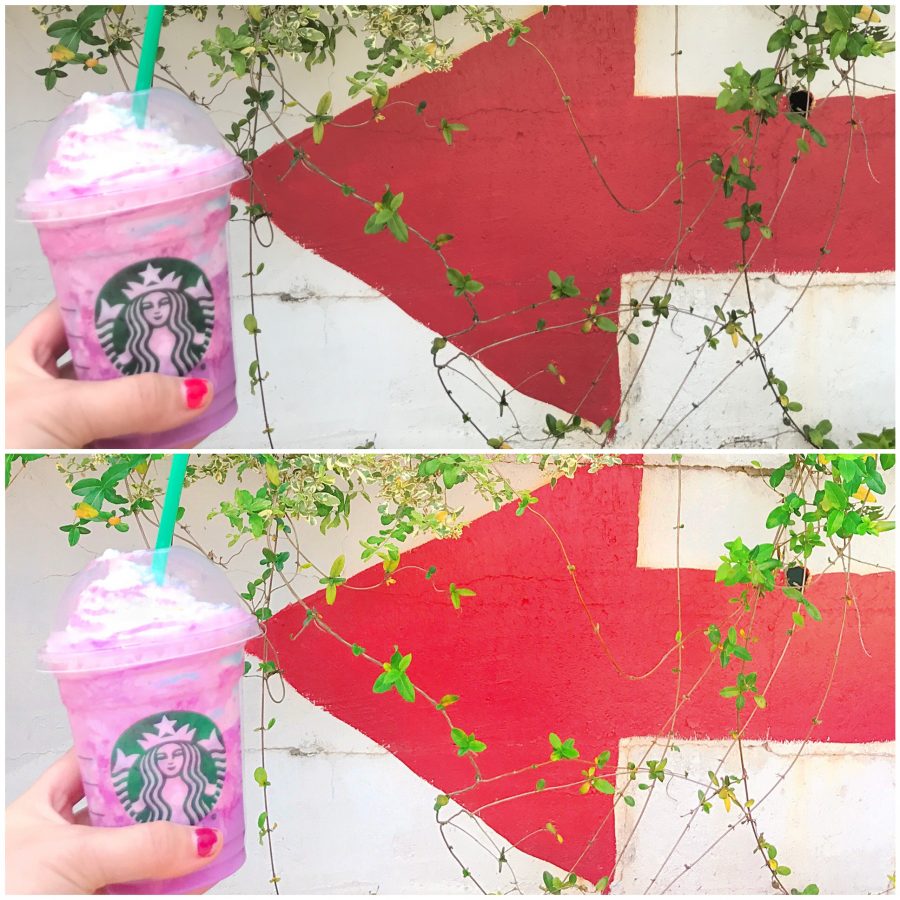
Snapseed is my go to if I’m in the photo or my hands because I can manually brush over the areas where I want to increase the saturation around me or make certain parts of the image whiter and brighter without over saturating the people in it. Have you ever wondered how bloggers get their wall mural photos so bold and bright? I’ll tell you how with Snapseed!
Plus, you can also brush over the areas where you want to remove the warmth or make increase the warmth. I generally try to cool down my images. For example, sometimes when I shoot in my kitchen there is a warm glow on the white subway tile and I don’t like that. It usually only occurs in the corners so I brush over the corner with the brush on a lower temperature setting to remove the warmth.
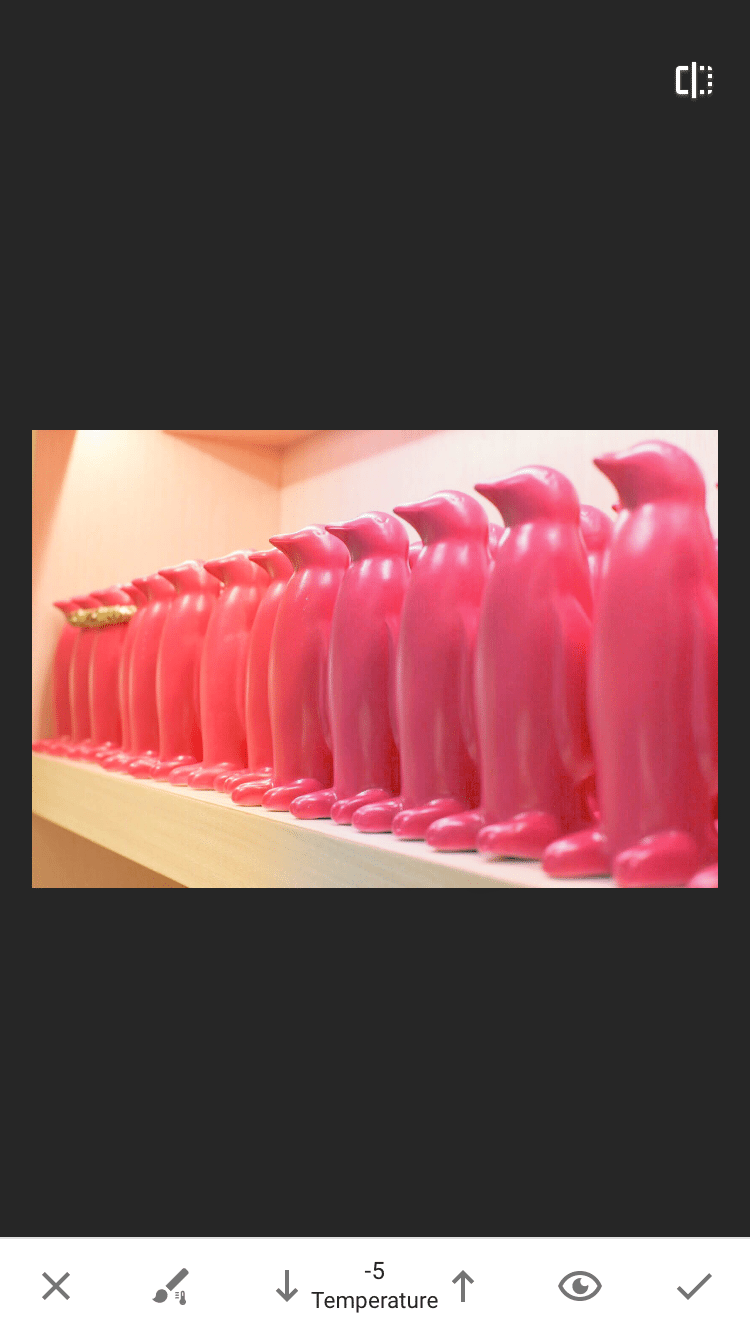
How to edit: (screenshot below)
-Open Snapseed
-Tap on the bottom right white circle with the brush icon. This is where your tools are.
-Click on brush and select exposure, temperature, or saturation. You can change the amount by using the arrows.
-Brush on the areas you want to edit with your finger
-Hit the check
-You can go back to brush here and repeat the steps above
-Save

3. Facetune
You will learn this app is gold. I do SO many things with facetune it’s almost embarrassing, but I’ll share those with y’all in another post. Facetune is great if you just want to brighten up a photo really quick but you want to keep the integrity of the colors. I use the lighting filters expose and lighter to brighten my photos.
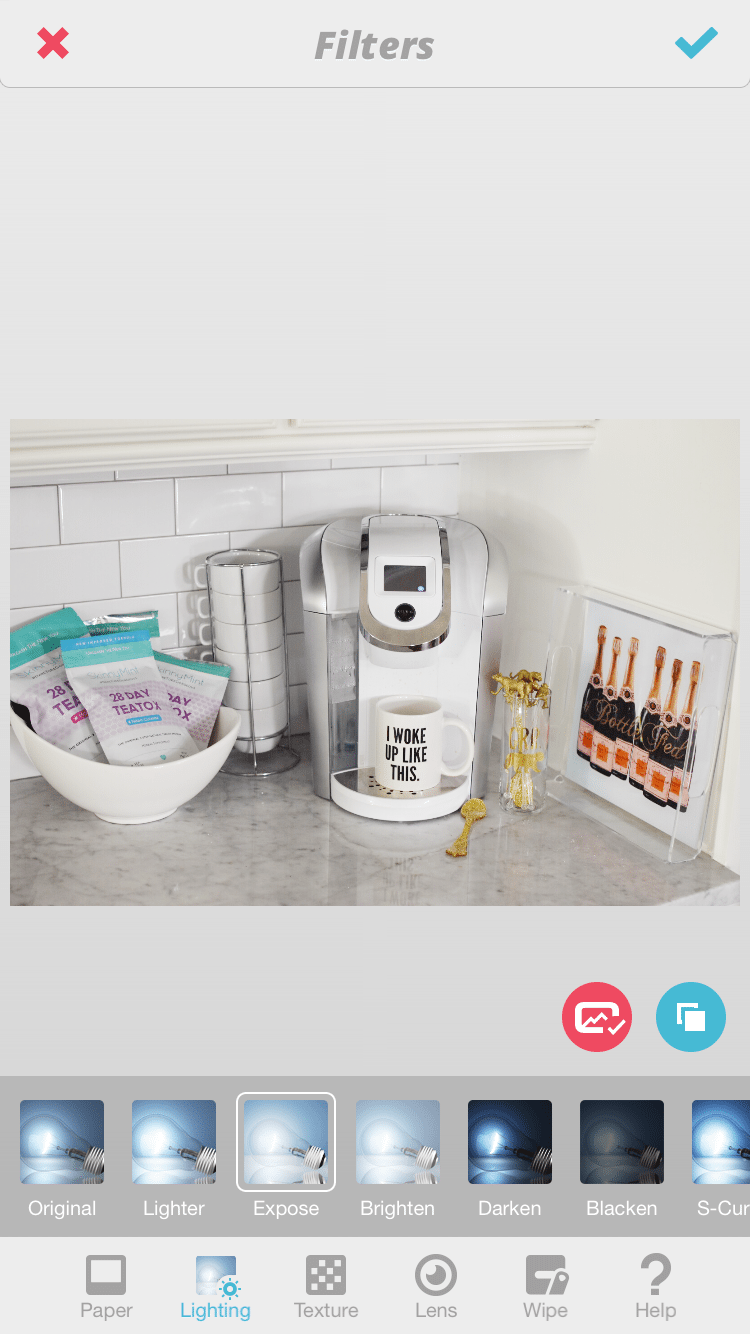
How to edit: (screenshot below)
-Open up your image in Facetune
-Click on filters
-Tap lighting
-Choose expose, hit check
-Choose lighter, hit check
-Save
*When you click on those filters, there is also a scale you can move to increase or decrease the amount so you don’t over expose your photo.
Don’t be afraid to mix and match these apps to edit the same photo. Sometimes I use facetune to brighten my photo then pop it in snapseed or a color story to increase the saturation on some things. Sometimes I use A Color Story and it over saturates my arm so I open up Snapseed and brush over my arm with the saturation brush at a -5. Play around with them and get familiar! The possibilities are endless. These edits won’t take you longer than a minute once you get used to using them. Hands down these are my top 3 favorite photo apps I use daily while I’m on the go and even when I’m not. I refuse to post a photo on Instagram until it has been edited with one of these apps. They are a must! I know you’ll love them as much as I do.
I’d love to see your edited photos so tag us @verbalgoldblog or use #VGBsquad!
Do you have a favorite app you edit your photos with that I didn’t mention? Drop it in the comments below!