MY HAT HOOK DIY
 Got a hat laying around the house? Good. Does it have a home where it can hang itself (in the best possible sense)? It doesn’t?? Well, you’ve come to the right place…
There are some really cute wire signs popping up online (like this one)
and I’ve been mulling over a way to incorporate one into our house.
Since I was in need of a place to hang a few choice chapeaux,
it occurred to me that these wire works of art could not only fun, but
functional as well.
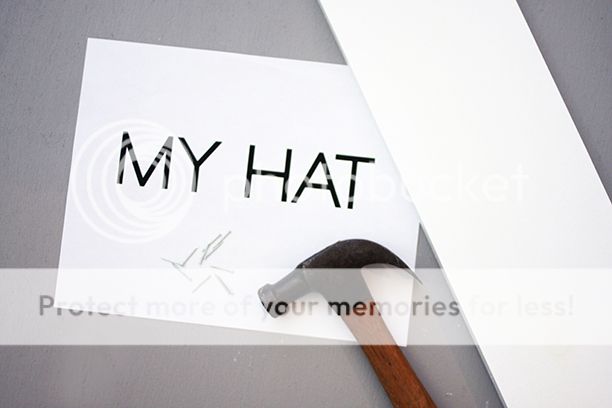
Supplies: You’ll need small nails, a hammer, a scrap piece of wood to
nail into, floral wire, needle nose pliers, and black spray paint.
First I printed my phrase (in a simple block font) the exact size I
wanted the final version to be. I nailed small nails into each point in
the letters where the wire would need to turn or switch directions.
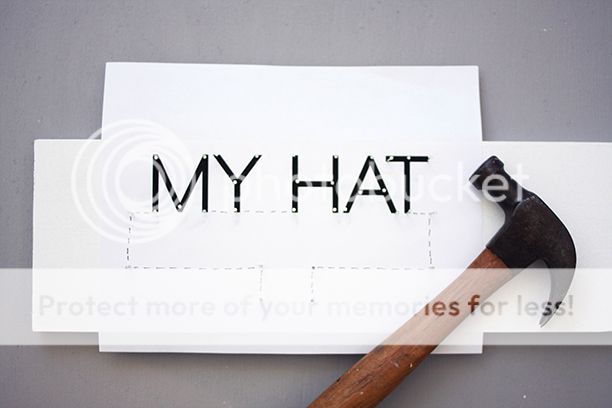
I also drew a small grid to follow for the bottom portion of my hat
hanger, outlining where the hook of my hanger would be placed.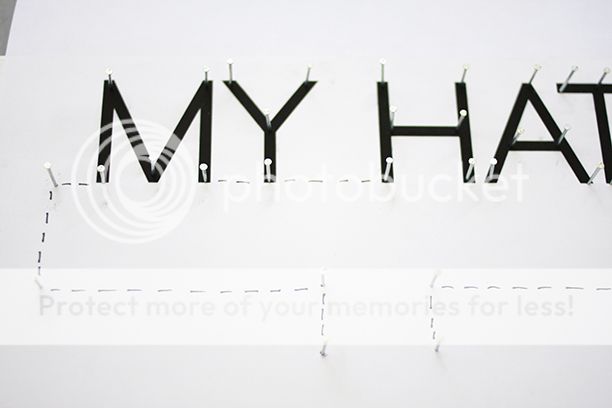
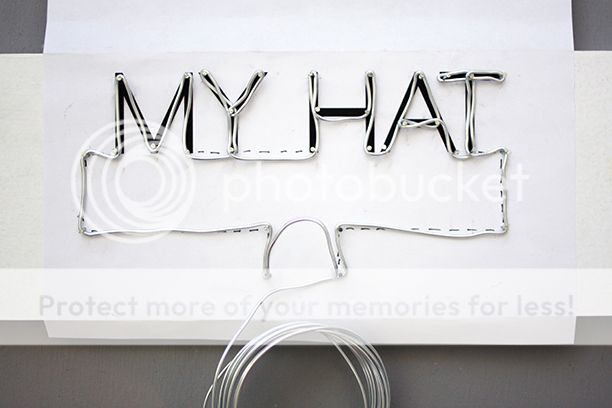
Starting at the bottom left of my diagram, I began to wind my wire
through my nail outline, using the nails as turning points for the wire
(floral wire is really easy to bend, so you should be able to do this
part with just your hands). Make sure to leave 6-7 inches of wire at the
beginning (or end) of your bottom opening to fashion your hat hook when
your phrase is complete.You’ll notice that on certain letters you have
to double-back down the same path to get to the bottom again (like on
the “Y” and “T”), but don’t worry if you have double wire on some
letters. 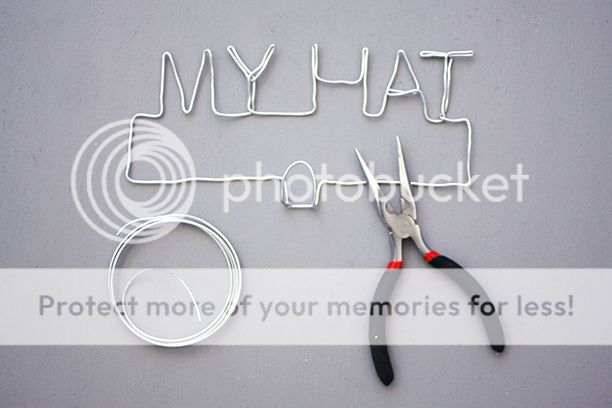
Once your letters are roughly in place and you get back to the
beginning of your diagram, remove the nails from the wooden board to
free your wire phrase and use the needle nose pliers to make any
adjustments necessary.

Make a long “U” shape with you 6-7 inches of extra wire and bend the U
up at a right angle to serve as your hat hook. Use the pliers to make
two small loops on each end of your wire (these will hook on to the
opposite wire sides to complete the hook).

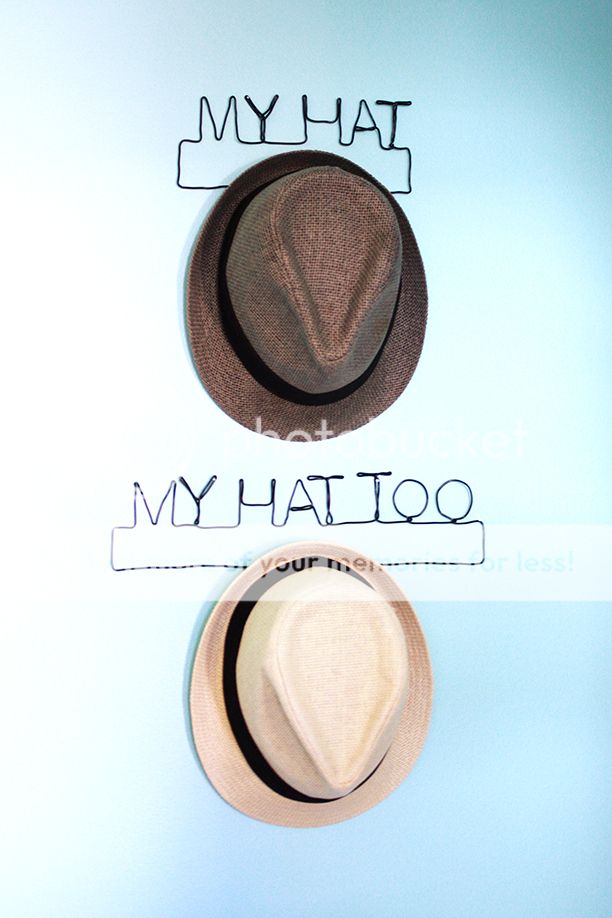
Give the wire phrase hanger a quick coat of spray paint, and you’re
finished! Use a few small nails to attach your wire phrase to the wall
and grab your hat to hang.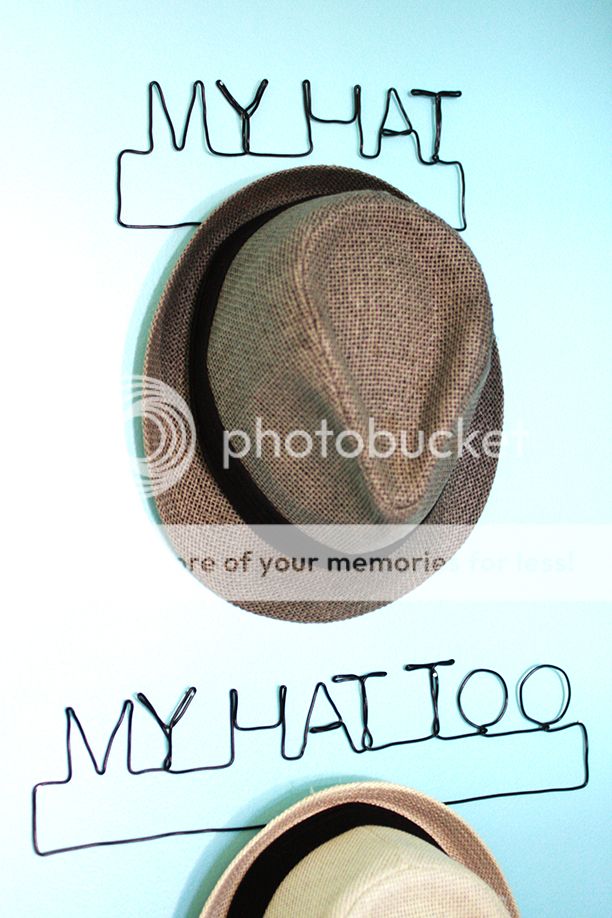

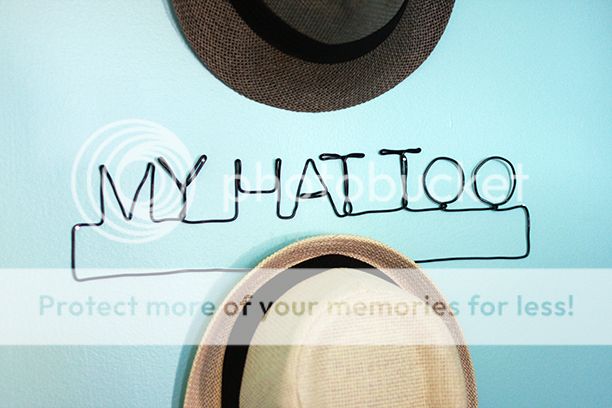
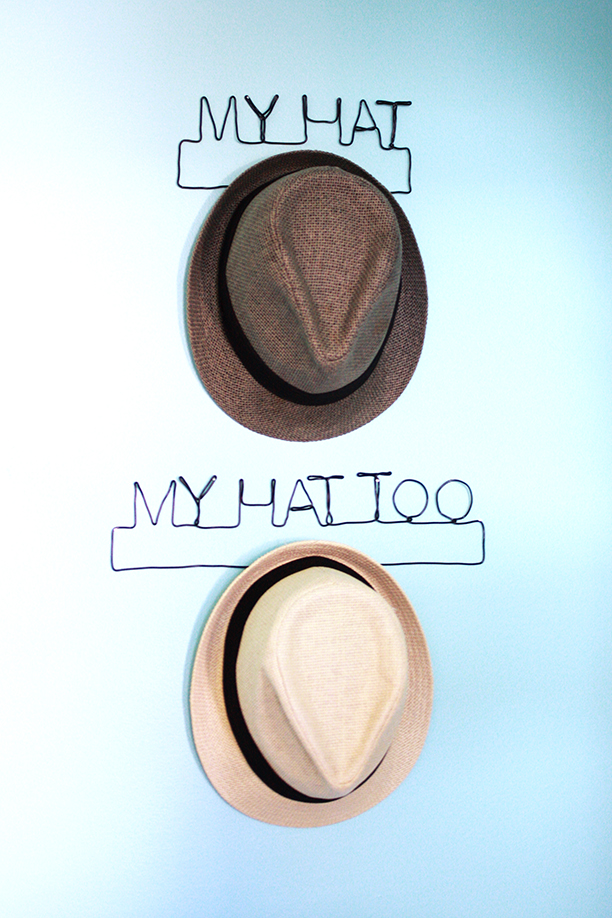
This
is one of the final projects that will go in our bedroom before I can
officially call it “done” (that is, done for now of course). The great
thing about this project is that you can customize the phrases to be
whatever you want! I thought about doing “his” and “hers,” but it seemed
funnier to make it look like whoever the hats belonged to was pretty
selfish with their hat hanging real estate.
Don’t you think these wire phrase hooks would be cute for hanging lots of other things too?

Thanks so much for sharing! Can’t wait to make my own!!!