
GIANT BOW DIY
Ok so when I saw this on Oh Happy Day I couldn’t resist … I mean after all it is a giant pink bow. Forget my ADD kicking in, the sheer cuteness of it got me feeling some type of way. I just had to share it with y’all!
Last month when my daughter and I were wrapping a birthday gift to bring to her friend’s party, the result was sort of underwhelming – especially for a 5 year old! “Mom, that gift looks kind of small” was her reaction once we had finished wrapping up the lovely little present we had bought. So, I thought “let’s make it bigger!” and came up with this easy giant bow gift wrap. All you need is a little more gift wrapping paper and you can make a big impression with an ittybitty gift!


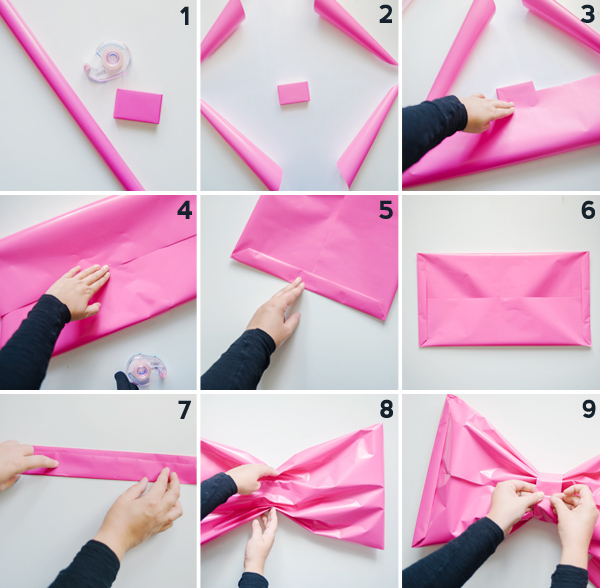
Step 1: Grab your materials and a little gift. The one i used is the size of a deck of cards.
Step 2: Cut a large piece of wrapping paper, a little longer than you want your ready bow to be wide. Place your gift right in the middle. If you want, you can fix it with a little double-sided tape. This will make the wrapping process easier.
Step 3: Start wrapping by folding over one side of the wrapping paper right up to the middle of the gift.
Step 4: Fold the other side in the same way and fix with transparent tape.
Step 5: Now fold and fix the sides of the gift just as you would with regular wrapping.
Step 6: You should end up with a large rectangle wrapping that carries your little gift right in the middle.
Step 7: Prepare a strip of paper about 3-5 inches wide and fold it 3 times length-wise. This will be the center of your bow.
Step 8: Now grab your wrapped gift and carefully push in the sides towards the center creating the bow shape.
Step 9: Flip it over, then wrap the prepared center strip around and fix it with tape in the back.
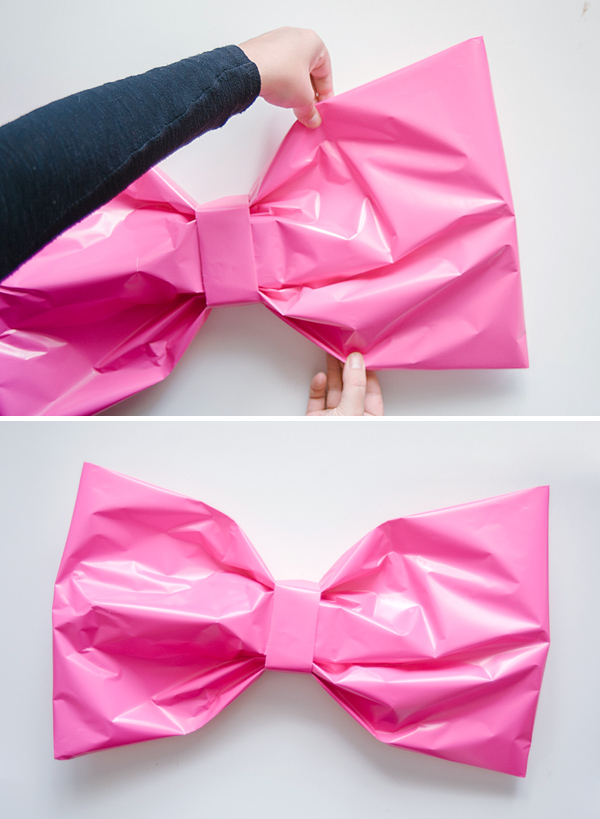
Now you’re done! If you want, you can carefully (!) pull apart the wrapping paper to open up the bow a little more. At my first attempt, I was doing this in a rush, so I tore up the paper.
Needless to say, my daughter LOVED these. So much that she almost didn’t want to give them to her friend.
– – – – – – –
So if you haven’t already checked out her blog OH HAPPY DAY go check her out now! It’s the cutest blog ever! She does a TON of super cute crafts!! I might be a little bias because she lives in San Francisco!